Showing posts with label tutorial. Show all posts

April 13, 2010

Pinwheel How-To

Ask and you shall receive. A drill was on my Christmas list and that's exactly what Santa brought. I didn't have any specific projects in mind for my shiny new drill, so when I first got it I was drilling holes in cardboard boxes just to "practice" (and because it was fun). Now, I'm happy to report I've use my drill for three real-life projects! The first of which was to create pinwheels for the Pinwheel Baby Shower, sure I could've just made them look cute and not actually functional and spinning, but where's the fun in that?

Here's the directions:
Use the template below to cut 4" squares from double-sided scrap-booking paper. I used the 4" size for the cupcake toppers, but you can always scale the template up or down as needed. I created some larger pinwheels for party decor as well.

The black dots indicate hole punches

I used my handy-dandy drill with a small bit to drill holes into wooden craft sticks (below).

Thread a tiny brad (found in the scrapbooking section) through each of the holes in the paper template, saving the one in the center of the paper for last and then through the craft stick. And there you have it, a functional, spinning pinwheel! I made several of these for the shower and many guests kept them as a party favor and are using them as decor in their office. They're so cute, it makes me happy every time I see one!

December 10, 2008

mmm... flowers

As I have talked about a lot... my grandma's birthday party was the Friday after Thanksgiving. I made the purple fondant flowers for her cake about two weeks ahead of time and froze them until the party. Here's a tutorial on how I made the flowers:

I bought pre-made white fondant that you can get at any craft store, like Michael's or JoAnn's. I used about 8 oz or 1/3 of the box. After sprinkling the surface with cornstarch, the first thing you need to do is color and flavor the fondant, if desired. As you can see below I applied gel food coloring in light purple and a small amount of pink with toothpicks. I omitted the flavoring because fondant doesn't really taste that good anyway, so it's kind of like you can put lipstick on a pig, but it's still a pig...


Once you have the coloring on the fondant, I recommend using plastic food-handling gloves to distribute the coloring. Stretch the fondant as if it were salt water taffy to help ensure a nice even coloring.


Keep stretching the fondant until you have a nice even color, add additional coloring as needed.
Helpful Hint: Break off a small piece of fondant and practice coloring that piece before you change the color of the whole block. A little color goes a long way.


Once you have your desired color, roll the fondant into a ball and pat down to a flatter shape. Roll out with a rolling pin. Craft stores sell special fondant rolling pins, but I haven't had any problems with a regular rolling pin... I think it may make a difference when you're rolling out a large piece to finish a cake, but not for small flower details and other attachments.


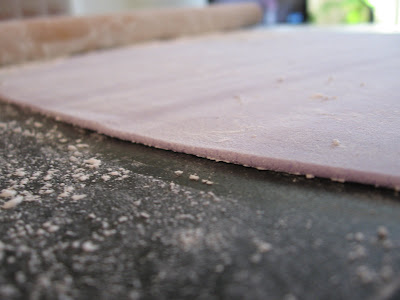
Roll very thin, about 1/8" thick.


Using a cookie cutter, cut out the desired shape.
Helpful Hint: Fondant dries out easily, especially when thin, placing a damp paper towel over the fondant when not in use will help prevent cracking.

To help give depth to the flowers, I make them 3D by pushing the center down with a stylist.
Let the flowers dry in the open for a day or two, until pretty dry and then store in an airtight container. Fondant can be stored in the freezer for a longer period of time.

More pictures of the final cake to come shortly.